If you want a properly validated PDF that complies with the accessibility standards, you first need to ensure that all validation errors are fixed. To better understand the validation process, read our previous blog post or watch its attached video.
Today, we will take a look at the different methods of fixing errors when working with Metadata.
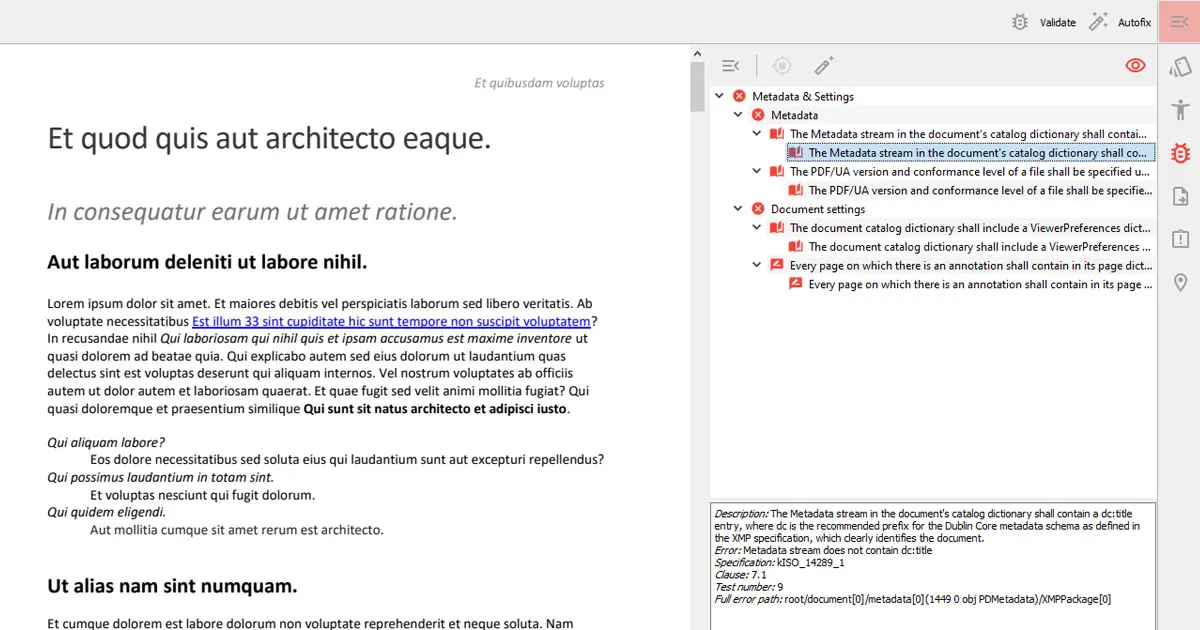
There are multiple ways of fixing the possible Metadata errors that may appear during validation. Prior to fixing the errors, make sure that you open and read the description of the individual errors.
Fix Error Button
In order to fix an arbitrary error, simply select it and use the Fix Error button. The Fix Error button works on most of the errors you may encounter, where it tries to provide a straightforward fix. You can use this button to fix the majority, if not all, errors present in your document.
Some errors require additional user input to be fixed properly. In such cases, the Fix error button shows an input dialogue, for example, prompting you to write in the correct document title if it is missing.
After using the Fix Error button, revalidate your document to make sure that the error was fixed.

Fix your Error Manually
If you understand the error description, you can fix the error manually through regular tools and actions.
First, we can take a look at the error indicating that our document is missing a title. The title of the document can be set in multiple ways, for example, by opening the Document properties located under the File menu in the document main menu. Here, simply type in the document title and press OK to confirm your choice.
Next, revalidate your PDF to view the changes.

The second error we will fix manually is the missing PDF/UA identification schema in our document. This can be fixed by navigating to the Accessibility panel and pressing the accessibility button. Here, select the Add PDF/UA identifier option and left-click to confirm.
Once again, revalidate your PDF to view the changes.

Fix Multiple Errors Simultaneously
PDFix also provides the possibility of fixing multiple errors at the same time. This can be done by using the Autofix button located in the validation panel. Autofix fixes all of the errors present in your document that do not require any additional input from the user.
After using Autofix, revalidate your document to see what additional errors need to be fixed.
The leftover errors, such as the missing document title, require additional data from the user and can be fixed through previously mentioned actions or by using the Fix Error button.

Congratulations, you are now left with a valid PDF!
Watch our other available video tutorials to learn how to fix any other errors you may encounter during validation. If you want to fix validation errors on multiple documents at the same time, you can follow our available video tutorial or read our blog on batch processing.