Today, we’ll delve into the functionality of our Table Tool, designed to enhance the accessibility of PDF documents by ensuring tables are properly tagged. By using this tool, you can add crucial details such as row and column headers, as well as descriptions, which significantly improve how screen readers interpret and convey table content to users. This blog will guide you through the process of tagging PDF tables, ensuring accessibility and usability are prioritized.
How to Tag a Complex Table in PDF
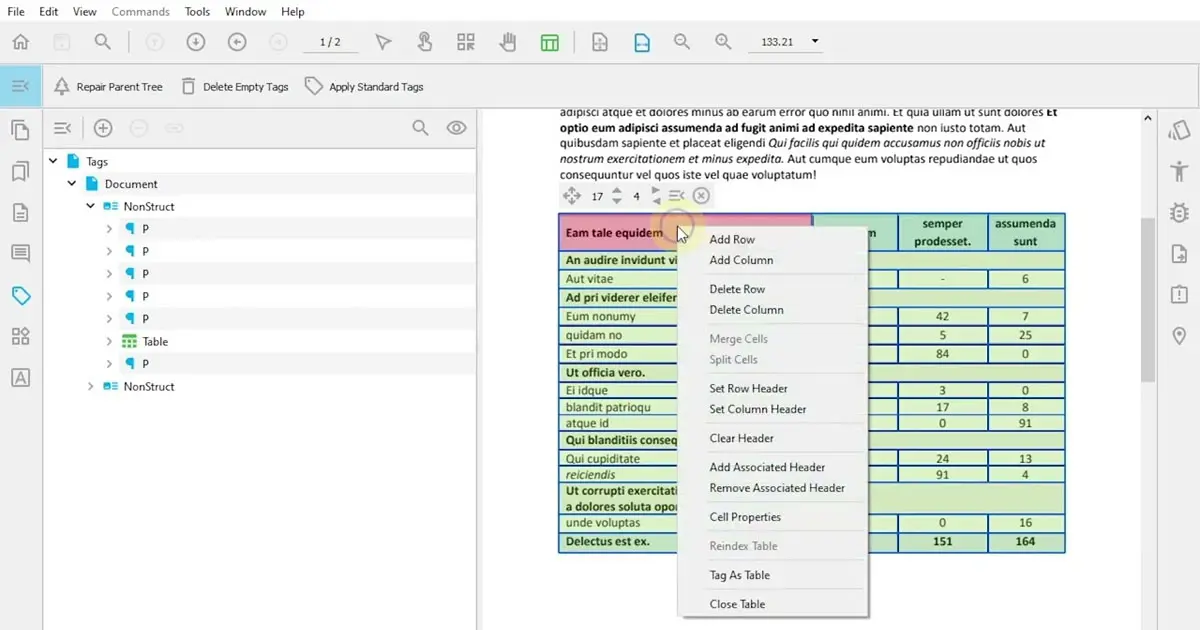
After loading PDFix and opening your PDF, locate the Tags panel on the left and examine your table. Now, you might see the table in the PDF is not tagged properly. It is possible to resolve this issue by manual tagging, but for complex tables, we suggest using our Table tool. To accomplish this, select the Table tool option from the top panel, and use it to select the desired table.

Dragging your entire PDF table now lets you see its current structure as the tag tree specifies. This also allows you to easily adjust the columns and rows to get a better view of your table.
Fixing Table Rows in PDFs
To start, let’s first focus on fixing the rows. Rows might be split into two and also has some redundant columns which might mislead the important data within the table. To delete a row and span empty columns in a table, right-click anywhere in the selection and choose “Delete row.” To span the empty columns, follow the same steps by right-clicking and now choosing “Merge cells.” See? Easy as it is. Your table is now accurately structured into rows and columns.
Cell Properties in PDF Table
Still, do not forget to make sure that all headers need to be specified. It then allows the screen readers to do the job and properly identify the individual parts of the table. To check, right-click and open “Cell Properties” which allows you to see additional data for every single cell within the table.
In the case that header cells are set incorrectly, as in our case as data cells, you might easily fix this by right-clicking and choosing “Set Row Header.” This easy step automatically specifies correct set and scope.

Adding Headers to PDF Tables
Even after these steps, the PDF table might have some divided rows which may cause difficulties for screen readers. To adjust this, select the rows from a single subpart, right-click, and choose “Add Associated Header.” After that, just click on the row cell on the top of this subpart and additionally follow this step to process all subparts. Done? Great! The table in your PDF is now set up correctly.
Mastering PDF Table Tagging
To finish this process, all that is left is to tag the object as a table, move it into its proper place in the Tag tree and delete the empty tag made in the process. In case your table is picture-perfect but you still need to modify a single thing, you can easily fix that just by locating the issued table tag in the Tags panel. After, by right-clicking, open the “Table Editor” and easily set correctly the header cells and simple data cells. Once all is done and your table is fixed, again right-click and choose “Tag As a Table.” To make the process perfect, do not forget to delete the additional empty tag.
Are all the steps properly done? Well, that’s it! Here comes your flawless table.