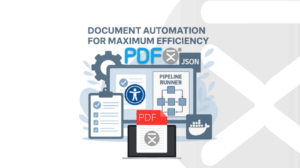
Discover our exclusive webinar designed to deepen your understanding of PDF accessibility and streamline workflow in Adobe InDesign. Whether you’re aiming to create accessible documents or looking to enhance your InDesign skills for better compliance with PDF/UA standards, our webinars offer expert insights and hands-on solutions. We demonstrated PDFix’s auto-tagging and quick-fix capabilities, which resolve these InDesign accessibility issues in just a few clicks. You’ll also learn about our advanced automation techniques, showing how to use batch commands to handle entire document collections, making PDF remediation faster and more efficient for any project. Watch now!
Auto-Fix PDF Actions
Below is a list of key actions for auto-fixing PDF accessibility that we covered, with a focus on enhancing your PDF workflow when working with InDesign and PDFix.
- Setting up key fixes for PDF accessibility
- Fix nested List or Content outside of LBody
- Set Contents for Links
- Artifact untagged content
- Remove invalid content marks
- Fix missing PDF/UA Identification Schema
- Fix missing Viewer Preferences in document Catalog
- Fix missing Name key in the OC configuration dictionary
- Fix missing Tabs key on page with annotations
- Flattening the tag tree and level-up nested structure elements
- Alternate text for images
- Automate with batch processing
Behind the Design of PDFix Desktop
In our webinar, we walked through the basics of using PDFix Desktop App and how to make the most of its features for PDF accessibility. The app layout is straightforward and user-friendly, similar to other document tools, so you’ll feel right at home. We focused on the main document view, where you can access most functions easily – especially the validation pane. The validation is built right into the view, so when you click on specific items, you can instantly see where the issues are. This feature is key because it lets you access many of the tools directly from the validation pane, saving you the time of hunting for buttons throughout the app.
On the left side, you’ll find common panels like pages, bookmarks, and content, plus options for recognition and fonts (we’ll go over these more in future webinars). On the right, there’s a template section that’s handy for setting up auto-tagging and manual tagging. Here, you can also access tools for conversion and more detailed PDF properties if you need them.
We also covered how to customize toolbars and shortcuts to fit your workflow, making the app even easier to use.
Let’s Start.
We went through a set of files chosen to highlight common accessibility issues. These files were picked specifically to show real examples of challenges you might face. We also demonstrated how to run batch validation on all the files, making it easy to spot and review issues. This feature links each problem to the specific document, helping you quickly understand what needs to be fixed.
Fix Missing PDF/UA Identification
We started with a straightforward issue: identifying PDF/UA compliance within a document’s metadata. We demonstrated how to use PDFix Desktop to address this by leveraging the “Fix Error” dialog in the validation pane. When a PDF/UA issue is detected, the dialog box guides you to select the correct standard, making the process efficient. Once applied, the issue will appear in a different color, allowing you to revalidate and check if the issue is resolved. PDF/UA identification is also available from the Accessibility pane, where additional functions are provided.
Artifact untagged content
Untagged content – a common issue often caused by path elements in InDesign files. These elements, while visible, are not actually part of the meaningful content and can confuse screen readers if left unchecked. Our tip: make sure to check for these path elements throughout your document. With PDFix Desktop, it’s easy to handle this directly from the validation pane. You can mark unnecessary items like headers, footers, or decorative elements as artifacts, so screen readers can skip them. This can be done for the whole document or just specific pages, giving you full control over what’s read aloud.
Set Contents For Links
Another common accessibility issue: links without content descriptions. Fortunately, our automated solution makes this process straightforward. You can either manually define custom text for the link description, or let the tool automatically pull text from the annotation bounding box or the link’s destination action. For example, if the link points to a website, it will automatically use that destination to set the description, ensuring your links are always accessible without extra effort.
Alternate Text For Images
Let’s talk about figure tags and adding alternate text. Our PDF processing engine offers several options – you can manually add your own custom descriptions, or use the content around the image. However, using surrounding content isn’t ideal, as it may repeat the same information, which isn’t great for accessibility. If you’re short on time or resources, though, it can be a quick workaround. You can also pull content directly from the image, which works well for charts or graphics with descriptions built in.
Fix Nested List Outside of LBody
Next, we showed how to fix a common issue with nested lists, particularly when they are placed outside the main document body. This can create accessibility challenges, but it’s easy to resolve with a regular expression-based function. By applying this fix, the tool automatically repositions the nested list content into the correct list body, ensuring proper structure and improving accessibility. We showed exactly how to run this function and how it quickly solves the problem, streamlining your PDF remediation process.
Structure Cleanup
Many customers have asked for a way to simplify the layout by moving content into a single level under the document. This is often needed because programs like InDesign can create deep, nested elements like articles and stories, making the document harder to manage. To address this, we’ve added a function that allows you to delete unnecessary tags, like articles and stories, and move their content to a simpler structure.
You can enter the names of the tags you want to delete, separated by a vertical bar, and choose whether to keep or remove the content. For example, articles usually don’t contain real content on the page, so deleting them simply moves the text to a cleaner layout.
We also offer the option to remove empty tags that don’t contain content, further cleaning up the document. This won’t affect essential tags like those for tables or DRS elements, which can sometimes be empty but still necessary.
Lastly, some customers wanted the ability to switch between role-mapped views and regular tag views. This gives you more flexibility in how you handle tags, and you can even remove role mappings completely if needed. While we don’t recommend this in most cases, we understand it may be necessary in some workflows. With these features, cleaning up document structure and making it more accessible becomes a lot easier.
PDF Accessibility: Automated Batch Processing
In PDFix Desktop, batch processing is handled right in the main application window, designed specifically to streamline accessibility fixes across multiple documents. Using the Action Manager, we’ve set up a collection of accessibility commands that cover most of the key fixes shared in our session. You can easily customize them to fit your needs by using the “Edit” button, which allows you to adjust each command’s properties. These properties are similar to those seen in the pop-up dialogues, giving you control over how the entire process is handled. Once configured, you can execute these commands across multiple files in a batch.
This Is How It Works!
Running the batch is straightforward : just select the documents, initiate the batch, and you’ll see a confirmation dialog that lists the files, output folder, and the list of operations to be applied. You can make final adjustments here, removing or modifying properties as needed. Once the batch runs, you’ll see progress in the Activity pane, and results appear almost instantly. When you review a processed document, you’ll find a clean structure in place, with only a few minor checks remaining. By adding these commands to the toolbar, you can quickly access and apply them to any document, making PDF remediation faster and easier.
AI-Powered PDF Remediation with External Actions
In webinar, we wanted to highlight an exciting new feature that leverages AI to generate alternate text for images. This functionality is part of our broader set of external actions, which allow you to integrate custom command-line tools directly into your workflow. By supporting command-line interfaces, we give you the flexibility to add any custom script or tool you use for document remediation. In our example, we’ve integrated AI to generate alternate text and detect languages automatically. Additionally, we’ve also launched Actions Marketplace – dedicated site where you can discover all available external actions, including OCR, language detection, HTML to PDF/UA conversion, and alternate text generation.
To use these actions, simply copy the name of the action from the marketplace and paste it into the editor by selecting “Add Action.” The action will run within a Docker container on your computer, and it will be downloaded and executed locally. Just keep in mind that Docker needs to be installed on your system for this to work.
Alt-Text Image Generator with Open-AI
As an example, we created a batch command that includes all the previously discussed functions, plus an OpenAI key, which you can easily generate as an OpenAI user. You can choose the language for processing and even overwrite existing alternate text. While processing might take a bit longer due to the interaction with OpenAI, it’s quick enough for smooth integration.
After deleting the previously processed files, we can run the batch again with the AI action, and the results will appear in the activity pane. Once the processing is complete, you can quickly review the document, and in my case – the image descriptions were generated in Spanish, which was the selected language.
The great thing about this process, which is powered by AI, is that it is handled through our batch pipeline. These pipelines aren’t limited to PDFix Desktop; they can also be used with the PDFix SDK. You can export the action as a JSON file, making it ideal for fully automated document processing systems. This feature is particularly useful for automating document remediation or preprocessing before any manual intervention.
For more details on these AI-powered tools, be sure to check out webinar’s Q&A section, where we covered a lot of great questions from the session. If you have any more, feel free to reach out to us at support@pdfix.net.
Happy PDFixing!


