If you want a properly validated PDF that complies with the accessibility standards, you first need to ensure that all validation errors are fixed. To better understand the validation process, read our previous blog post or watch its attached video. Today, we will take a look at the different methods of fixing errors when working with Figures. This concerns the Alternate Description Error for Figures.
Fix it manually
This error can either be fixed manually for each present figure or automatically for multiple figures at the same time.
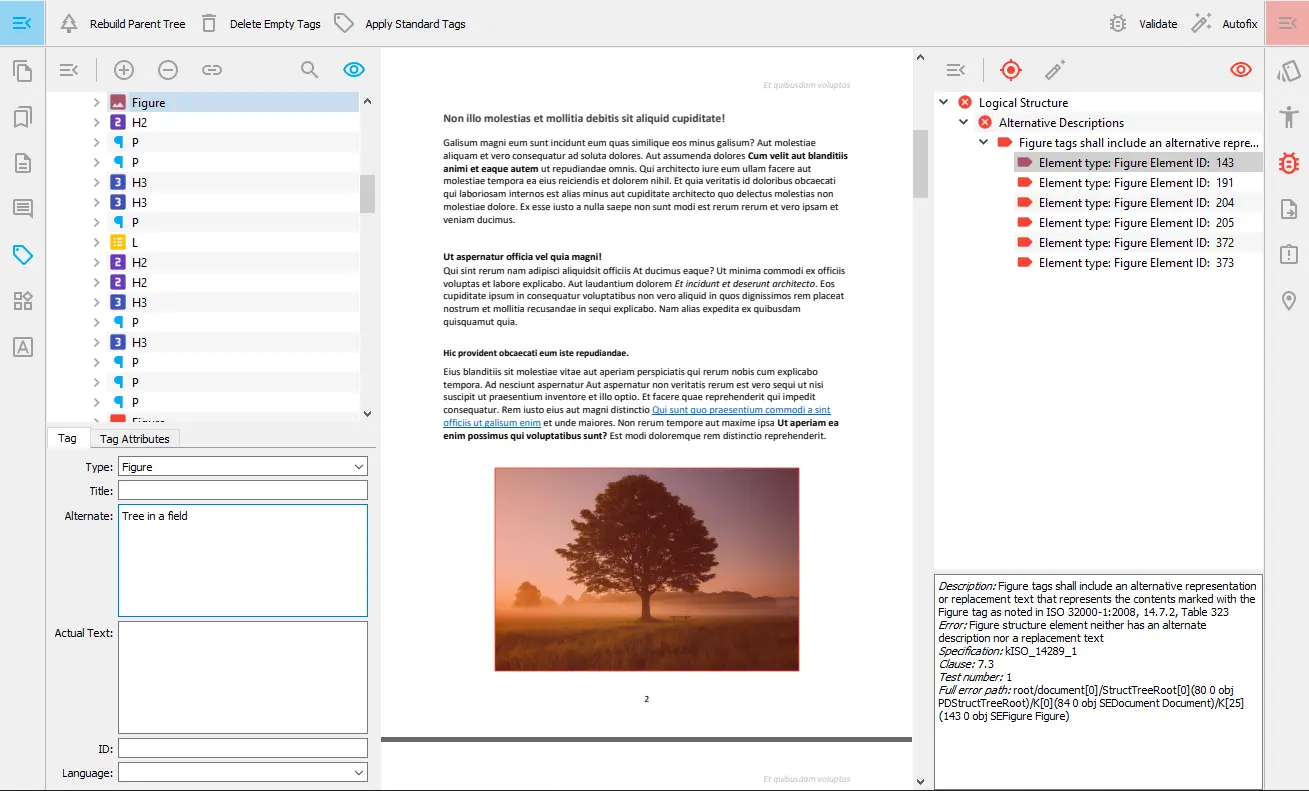
First, manually select the specific figure you want to fix. PDFix automatically navigates you to the corresponding Figure tag in the Tags panel. In the tags panel, press the Properties button, which shows the current figure description. Type in the desired alternate description, and make sure you press enter to register the change. After that, simply revalidate your document to ensure that the Alternate Description Error was fixed.

Fix multiple errors simultaneously
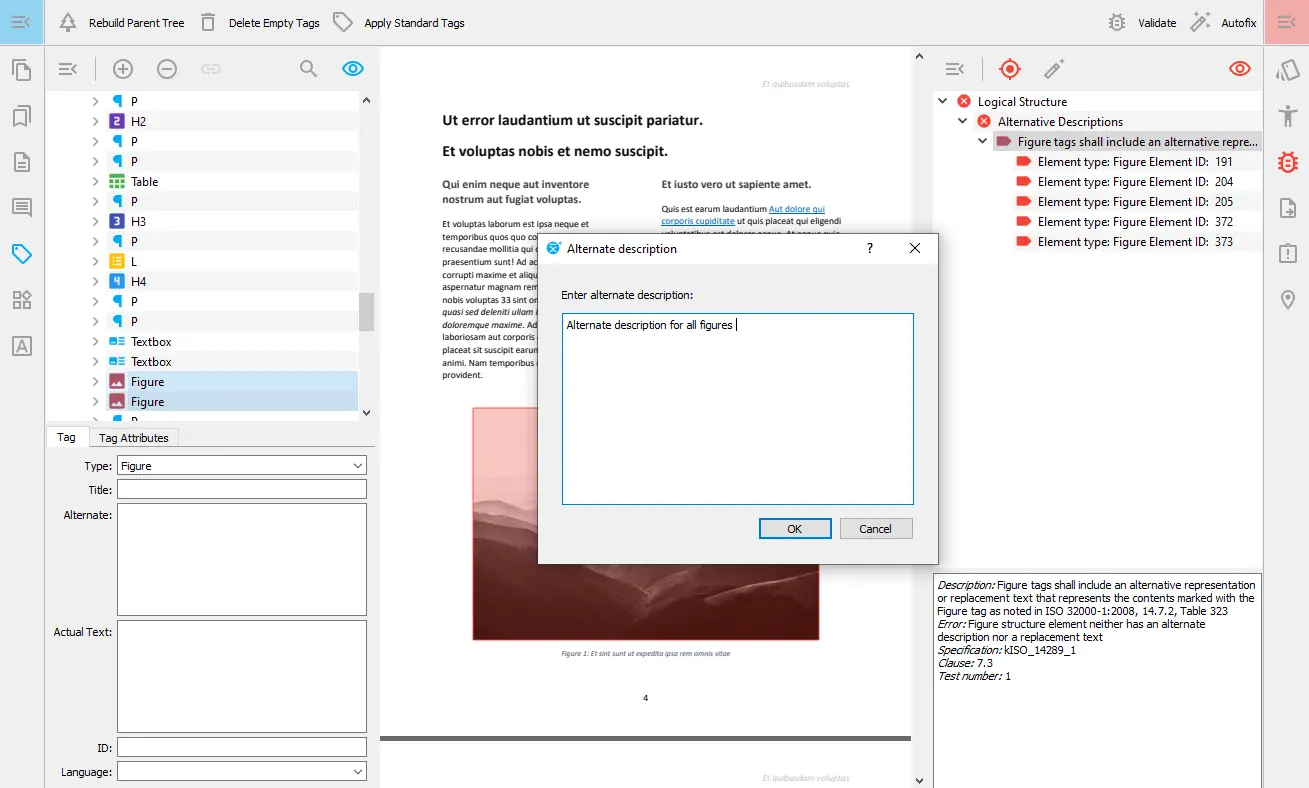
You can also fix multiple or all of the errors simultaneously. Locate the validation panel and select all of the errors you want to fix. Next, press the Fix Error button, which provides a straightforward fix for most existing errors. This opens a dialogue where you have to type the alternate description, which will be set for all of the selected figures. Press OK and revalidate your PDF to see the results.
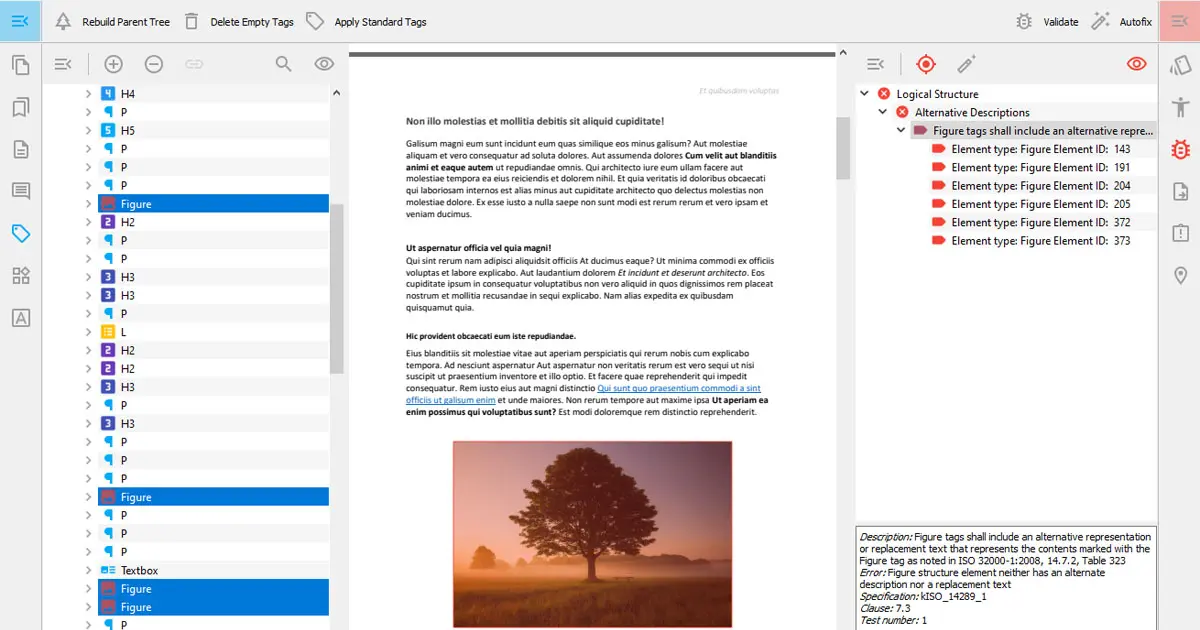
If you want to fix all of the errors at the same time, click on the parent error message. This selects all of the corresponding figures in the Tags panel. Once again, press the Fix Error button and repeat the previous process.

Finally, revalidate your document to ensure that all of the errors are fixed. Congratulations, you are now left with a valid PDF.
If you haven’t found the fix for an exact error present in your document, look at our other blog posts and video tutorials concerning the topic of validation.


